


The passenger door lock actuator had been working very slowly and sometimes not at all, and then the Driver door lock stopped suddenly.
Honda dealers in Australia quote $215.00 for one Electronic door lock actuator, I needed two.
I found some brand new units on eBay for an Accord Euro. 2003 to 2007. The quality of the picture allowed me to zoom the part number on the casing and it matched mine, it looked identical and was only $28 delivered, so I ordered one. A far cry from the obscene $215.00 quoted by the Honda dealer, on arrival it was dentical to standard Accord and was indeed the same part number. There is Left and a Right door model.
While waiting for the new unit to arrive I decided to see why the motor had failed, HINT - I never fitted the new unit, it's now a future spare.
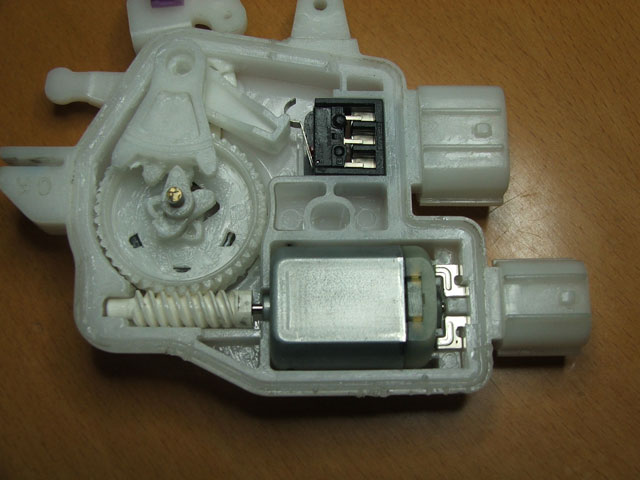
This actuator is a very simple device and by today's standard should cost no more than $30 to $40. It has a moulded plastic housing, a small motor and a micro switch along with a plastic screw-drive and cog.
The worm drive is centre spring loaded, quite strongly so, hence the instant stall. This strong return design brings the gear back to a central position - midway between lock and unlock. This simple but effective design makes for even simpler mechanical and electronic control via nothing more than a limit micro switch. It's the reason for the strange behaviour of this device when there is carbon build up around the brushes and commutator.
Motor, gear and Micro Switch (Black object)
Honda dealers in Australia quote $215.00 for one Electronic door lock actuator, I needed two.
I found some brand new units on eBay for an Accord Euro. 2003 to 2007. The quality of the picture allowed me to zoom the part number on the casing and it matched mine, it looked identical and was only $28 delivered, so I ordered one. A far cry from the obscene $215.00 quoted by the Honda dealer, on arrival it was dentical to standard Accord and was indeed the same part number. There is Left and a Right door model.
While waiting for the new unit to arrive I decided to see why the motor had failed, HINT - I never fitted the new unit, it's now a future spare.
This actuator is a very simple device and by today's standard should cost no more than $30 to $40. It has a moulded plastic housing, a small motor and a micro switch along with a plastic screw-drive and cog.
The worm drive is centre spring loaded, quite strongly so, hence the instant stall. This strong return design brings the gear back to a central position - midway between lock and unlock. This simple but effective design makes for even simpler mechanical and electronic control via nothing more than a limit micro switch. It's the reason for the strange behaviour of this device when there is carbon build up around the brushes and commutator.
Motor, gear and Micro Switch (Black object)
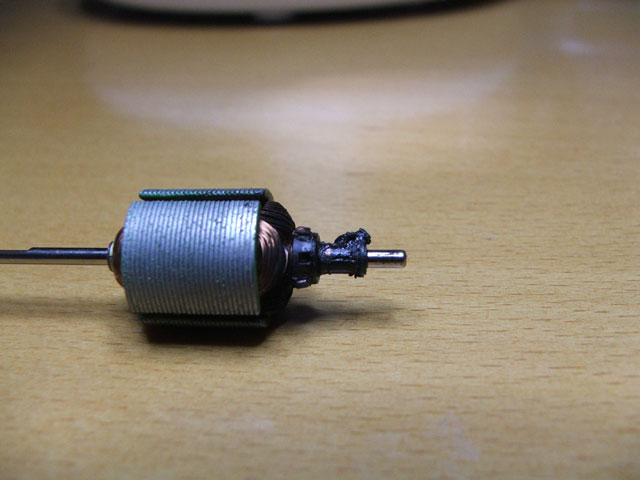
The unit would draw current for a second and then do nothing. There was a lot of old carbon deposits from the brushes all mixed with grease, it was deposited in the end housing and over the brushes and commutator. On close inspection under a large magnifier this conductive grease appeared to be packed solid between the two commutator poles. Further testing indicates that the carbon build up not only causes a partial short between the poles but can also lift the brushes of the commutator causing the motor to instantly stall.
When I tested the motor (which BTW is only meant to be powered for a brief second or so) it emitted smoke from the housing and drew an initial surge of high current and then nothing. Same as in the vehicle where the lock leaver would move slightly only once - no visible smoke though.
I cleaned the commutator gaps with a sharp jewellers flat blade and sprayed the brushes and commutator with a non residue electrical contact cleaner. Lo and behold - it worked perfectly. Reassembled and connected to the vehicle (not installed though) and testing every 10 minutes for a few hours - absolutely perfect, in fact its now the fastest moving actuator of the four. Decided to fully reinstall it and it's working to this day.
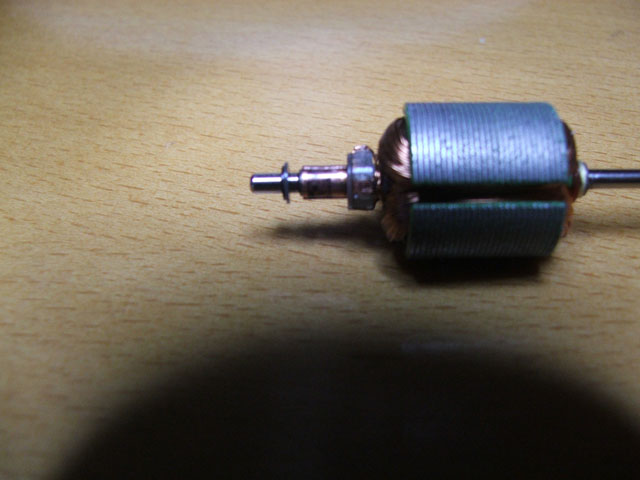
The motor winding is held in the housing by magnetic force - it simply pulls out.
When I tested the motor (which BTW is only meant to be powered for a brief second or so) it emitted smoke from the housing and drew an initial surge of high current and then nothing. Same as in the vehicle where the lock leaver would move slightly only once - no visible smoke though.
I cleaned the commutator gaps with a sharp jewellers flat blade and sprayed the brushes and commutator with a non residue electrical contact cleaner. Lo and behold - it worked perfectly. Reassembled and connected to the vehicle (not installed though) and testing every 10 minutes for a few hours - absolutely perfect, in fact its now the fastest moving actuator of the four. Decided to fully reinstall it and it's working to this day.
The motor winding is held in the housing by magnetic force - it simply pulls out.
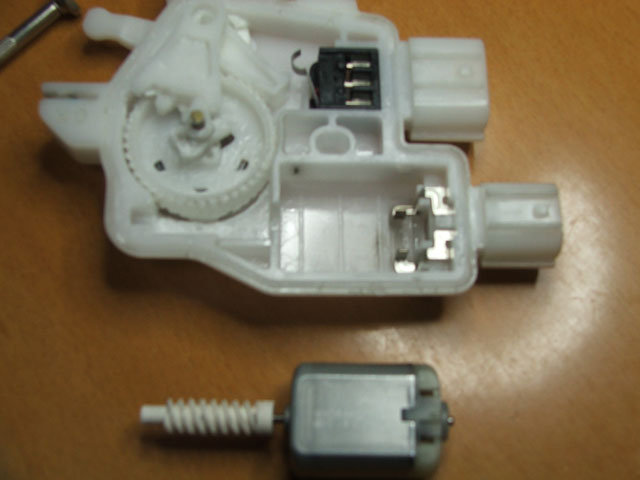
Motor just lifts out, no soldering no wires. The plastic worm drive pulls off the motor spindle.
It appears that slow moving and seemingly inoperative units may be suffering from years of carbon and grease hardening between the contacts, effectively shorting the motor. The wisp of smoke I saw was from the grease and carbon mixture, not the motor winding or brushes.
If the motor winding is not open or shorted, then this is the most likely cause as the gear drive is like new and there is nothing to really jam of seize in this housing.
If you're stuck for an actuator then it may be worth a try - costs you nothing and is really easy to do. I have since repaired the passenger unit as well as the driver unit - same buildup of carbon & grease - both are working perfectily
The best way to test the motor is by plugging back it into the Vehicle harness. There is a danger of damaging the unit if you directly apply 12 volts to the motor without the limit switch in circuit. The amount of on-time is less than a second, without the limit switches in circuit there is a danger of damaging the gear or motor.
Commutator after cleaning.
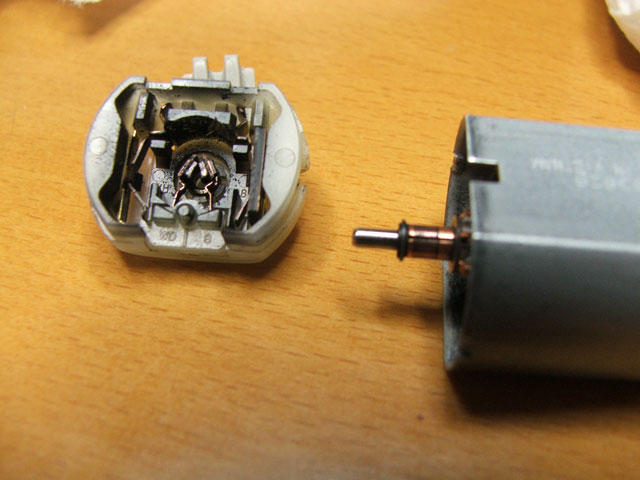
The end cap is retained by two metal tabs, these need to bent out a small amount with something like a small flat blade jewellers screw driver.
Be careful when removing the motor end cap. The cap needs to be removed slowly and as squarely as you can. This is to stop the brushes bending or catching on the lip of the commutator. The same care should be exercised when refitting the end cap.
Brushes and Commutator after cleaning.
Be careful when removing the motor end cap. The cap needs to be removed slowly and as squarely as you can. This is to stop the brushes bending or catching on the lip of the commutator. The same care should be exercised when refitting the end cap.
Brushes and Commutator after cleaning.
