Car Computer - Installation picture and Notes
NOTE: This system has been replaced by a tiny Palm sized MiniPC running Win 10 and home made Head unit (back to OEM look).
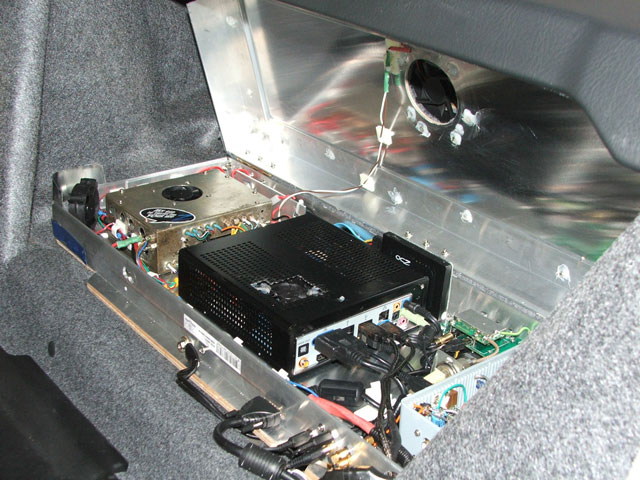
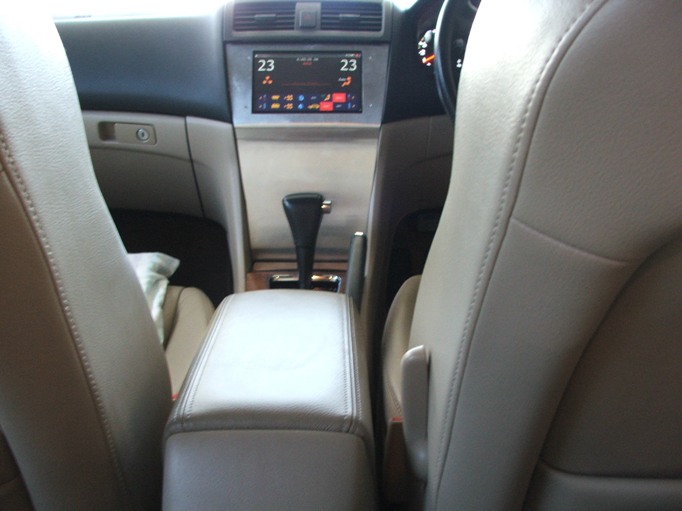
I have gone from a small system behind the dash (the first build) to a larger case mounted in the trunk (2nd build) and now to this very large case mounted in the trunk in a recess in the floor behind the back seat. This is a fabulous location in this vehicle. The new case draws air through the rear seat centre arm rest (vented) and exhausts air into the boot spare tire well. It runs as cold as, even on the hottest of days.
The larger case is a joy to work on and make changes to hardware. Simply lower the back seat and lift the lid, no screws to undo, no reaching into inaccessible places. Most connections are by sockets mounted along the front of the case and it literally takes under 2 minutes to remove the PC from the car and have it running on the bench.
The boot can be filled with luggage chucked in anywhere without any concern about blocking vents or throwing anything on top of the PC.
One problem with a trunk install can be heat. The 2nd installed systems (small case) power usage was only 36 Watts, however after 3 hours of driving on a hot day, recirculating air inside the boot would gradually heat the system and although the temps are within design limits there would be a real problem with a trunk full of luggage on a hot day.
To overcome these problems I redesigned the case and rebuild the PC for the third and final time. I wanted full control of layout, separation of modules and full control over a common ground plane without compromising for lack of space.
The MB was updated with a new model from Gigabyte. BTW these are Micro mother boards and are under 6" x 6" in size. This new MB with the same processor and ram draws just 24 watts when running (the older model was 36 watts) Peak start-up current is halved from 8A to 4A and the system heat-sink is now a much larger unit on this later Motherboard.
This complete system including 8” LCD and all devices powered draws a total of 35 watts from the supply when running.
The case is made from PLY with thin sheet aluminium (low cost) and aluminium angle bracket. Both items were available at the local hardware. Thin aluminium sheet is glued to a ply top and bottom panel. Angle bracket is cut and screwed to the ply top and bottom panels.
The lid is secured by three hinges and is electrically bonded with a thick flexible copper strap. When the lid closes, the angle brackets “snugly” overlap with the top lid brackets resting on 3 large limit screws. This makes a very strong light case that, when mounted in the trunk, supports any weight of luggage that is placed or thrown on top. The item in the lid is the base of the intake fan, this picture is of the unfinished case.
The lid is secured by three hinges and is electrically bonded with a thick flexible copper strap. When the lid closes, the angle brackets “snugly” overlap with the top lid brackets resting on 3 large limit screws. This makes a very strong light case that, when mounted in the trunk, supports any weight of luggage that is placed or thrown on top. The item in the lid is the base of the intake fan, this picture is of the unfinished case.
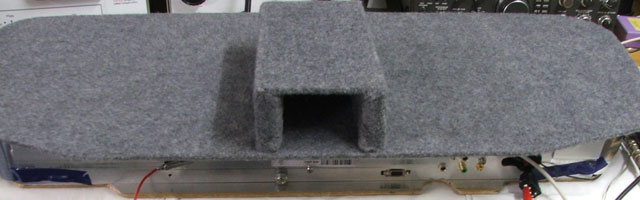
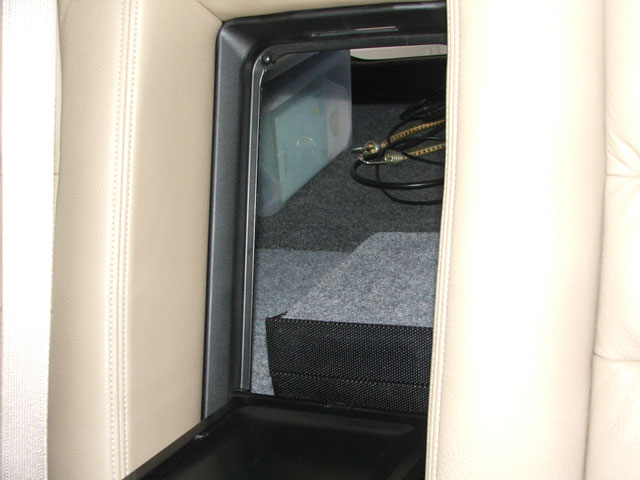
A top forward facing vent draws cool cabin air in through a screen behing the center arm rest in the rear seat.
Forward facing vent draws cool cabin air in through a screen behing the center arm rest in the rear seat and can not be blocked by any luggage in the boot, even when packed to the hilt.
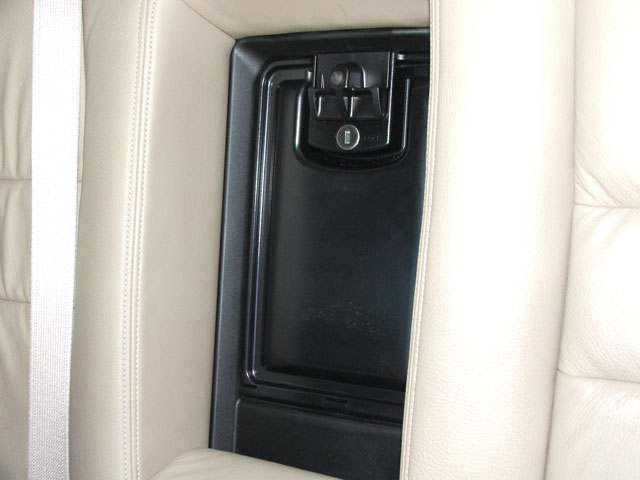
The larger case is a joy to work on and make changes to hardware. Simply lower the back seat and lift the lid, no screws to undo, no reaching into inaccessible places.
Most connections are by sockets mounted along the front of the case and it literally takes under 2 minutes to remove the PC from the car and have it running on the bench.
Most connections are by sockets mounted along the front of the case and it literally takes under 2 minutes to remove the PC from the car and have it running on the bench.
Forward facing vent draws cool cabin air in through a screen behing the center arm rest.
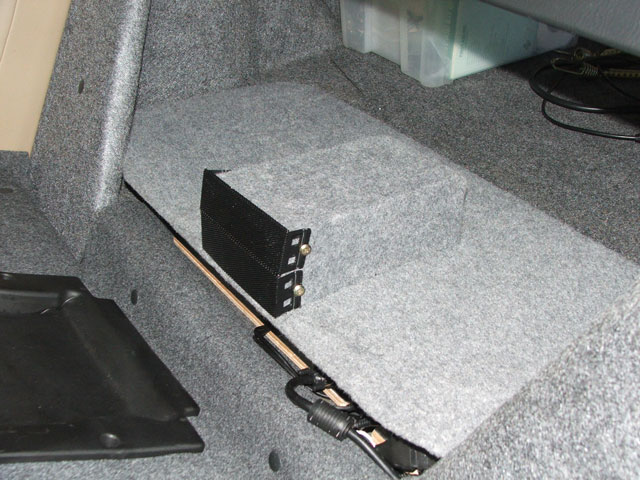
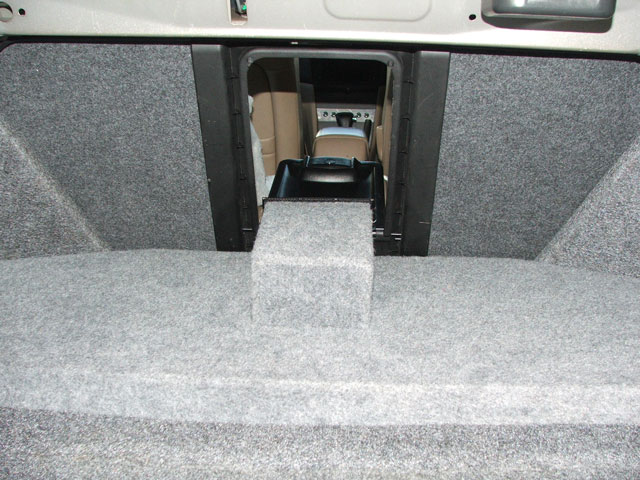
The case sits slightly higher than the rest of the trunk floor when sitting in the recessed section of the floor. Vitrually no change in boot space and center loading / access door works as normal.
This case can be jumped on, so nothing carried in the trunk can damage this case in any way.
The case sits slightly higher than the rest of the trunk floor when sitting in the recessed section of the floor. Vitrually no change in boot space and center loading / access door works as normal.
This case can be jumped on, so nothing carried in the trunk can damage this case in any way.
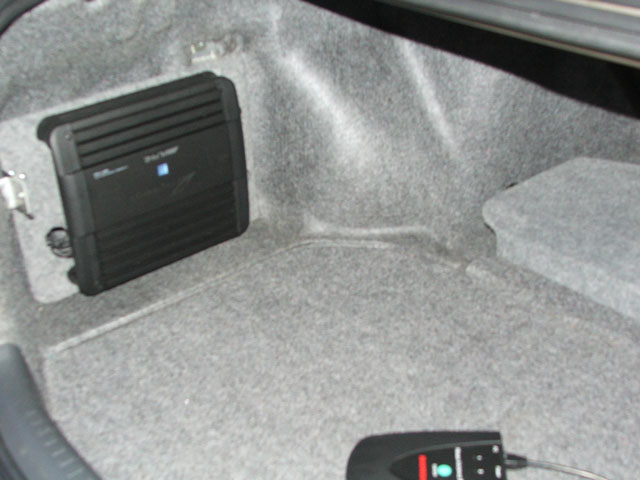
4 Ch Alpine power Amplifier fed via an optical coupled DSP system, you can see the CAR-PC case in the floor recess
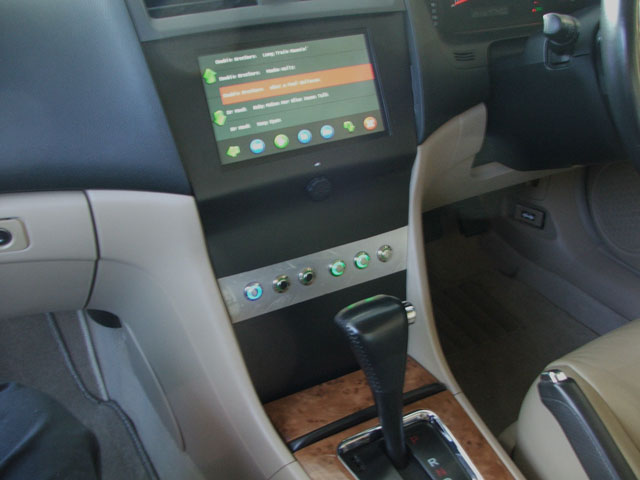
The Physical control panel that interfaces to the Car PC.
The buttons are:
1. Home.
2. HVAC.
3. SAT NAV.
4. DAB digital Radio.
5. Music player.
6. Hi Def Web cam recording
The two knobs are:
A. Volume.
B. Context sensitive Menu control and application control without using the touch screen.
For example if the GPS is showing, rotating the center Knob zooms the Map in or out. If Music player is on screen the Knob scrolls through the play list, pushing the Knob selects a song.
Prototype panel.
Night time view of the 8" touch screen display.
An early version of HVAC control software is shown.
Night time view of the 8" touch screen display.
An early version of HVAC control software is shown.
Still the Prototype panel with 8" touch screen display showing an early version of Music player software running.
This also shows the Hardware HVAC control buttons.
This also shows the Hardware HVAC control buttons.

Prototype panel
The first test of the 8" touch screen display showing an early version of HVAC control software running.
The first test of the 8" touch screen display showing an early version of HVAC control software running.


